

Kitchen Island Lighting Guide: Height, Spacing, Size, and Color Temperature
Designing a completely new cooking space brings up an endless wave of choices. You pick out the heavy vinyl flooring, select the massive stone countertops, and spend weeks trying to lock down the exact cabinet layout. Yet, one specific detail frequently trips property owners up right at the very end of the project. Figuring out the right Kitchen Island Lighting matters way more than just picking a pretty glass shade from a glossy catalog. This overhead setup completely dictates how well you can chop vegetables on a cloudy afternoon and sets the evening mood for late-night family conversations. Getting the math wrong leaves you with blinding bulbs right in your eyes or annoying dark shadows exactly where you need to work.
This guide breaks down the physical dimensions and design tricks you need to get your layout looking completely proportional and highly functional.
Ideal Height for Kitchen Island Lighting
Setting the exact vertical drop for your fixtures builds the architectural foundation for the entire room.
Standard Countertop Clearance
The golden rule in the modern building industry states that the bottom rim of the fixture needs to hang exactly 30 to 36 inches above the countertop surface. That specific number is not just a random guess thrown around by decorators. A standard prep station sits 36 inches off the floor. Adding that 30-inch gap puts the light source just above the eye level of an average adult. This arrangement provides perfectly clear illumination for heavy meal prep without blocking your view of the adjoining living room. Sometimes, a homeowner might try to hang a heavy vintage fixture lower just to make the room look dramatic. That usually backfires the very second a taller guest leans across the stone to grab a drink and smacks their forehead on solid brass. Sticking strictly to the 30-to-36-inch window totally prevents those awkward bumps.
Ceiling Height Adjustments
Rooms featuring unusual architecture require a slightly different mathematical approach. The standard 30-inch gap applies perfectly to a normal eight-foot ceiling. However, if the house features a massive nine or ten-foot ceiling, those standard measurements leave the fixtures looking somewhat disconnected from the roof, almost like they are dangling on a dangerously thin piece of string. For every extra foot of ceiling height above eight feet, you should raise the fixture by about three inches. A nine-foot room means a 33-inch gap, and a ten-foot room demands a full 36-inch clearance. This simple upward adjustment keeps the visual weight of the room perfectly balanced without sacrificing brightness.
Proper Spacing and Fixture Quantity
Arranging multiple ceiling fixtures correctly across a wide space guarantees bright, even coverage across your whole workspace.
Pendant Spacing Rules
Getting the horizontal layout right is where things get slightly technical for the installation crew. The center point of each light bulb needs to sit anywhere from 24 to 36 inches apart from the next one. You also must leave plenty of breathing room at the far ends of the stone slab. The outermost lights should hang at least six to twelve inches inside the hard edge of the countertop. Placing a bright bulb directly over the edge creates harsh, strange shadows on the floor and makes the whole ceiling arrangement look incredibly crowded. To achieve the perfect Kitchen Island Lighting setup, experienced builders often snap a straight chalk line right down the middle of the ceiling to map out these exact gaps before drilling any drywall holes.
Table 1: Fixture Quantity Based on Island Length
| Island Length | Suggested Number of Fixtures | Ideal Fixture Style |
|---|---|---|
| 4 to 5 feet | 2 pendant lights | Small to medium glass domes |
| 6 to 7 feet | 3 pendant lights | Medium metal cones or globes |
| 8+ feet | 1 linear bar or 4 small pendants | Oversized bars or minimalist strips |
(Data reflects standard residential layout practices for overhead illumination.)
Island Length Proportions
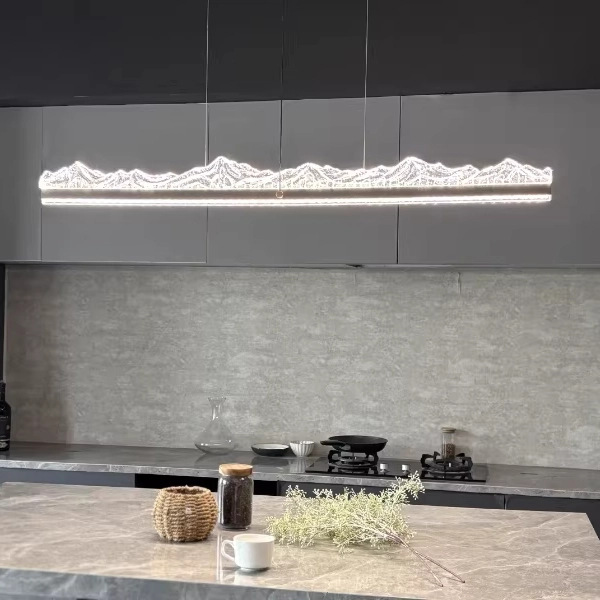
Deciding how many individual units to hang depends entirely on the physical length of the stone slab sitting below. A compact four-foot prep station usually looks best with just two medium-sized fixtures. Once you hit the highly popular six or seven-foot mark, the classic arrangement of three lights works perfectly. Odd numbers create a highly pleasing aesthetic symmetry for the human eye. But modern interior design is definitely shifting away from clutter. For those giant eight-foot slabs, hanging four or five small pendants just looks messy. A much cleaner choice involves using a single, long linear bar that stretches out horizontally to provide one continuous, uninterrupted beam.
Optimal Size and Design Integration
Selecting the physical dimensions and raw materials of your ceiling light sets the entire architectural tone.
Fixture Scale and Diameter
Selecting the correct physical width stops the ceiling from feeling extremely heavy or claustrophobic. Designers follow a very strict two-thirds rule when shopping for parts. The total diameter or width of your Kitchen Island Lighting should measure roughly two-thirds the total depth of the slab sitting beneath it. If you have a standard 36-inch deep surface, your light fixture should measure right around 24 inches across. Anything significantly wider feels like a heavy airplane hovering right above your morning coffee mug. Conversely, anything too small, like a tiny six-inch glass teardrop, just completely disappears visually in a large open-concept room.
Cabinetry and Hardware Matching
Overhead fixtures never exist in isolation. Their metal finishes and glass textures have to communicate directly with the rest of the room. When the glow hits a sleek, beautifully crafted White Kitchen Cabinet, the glossy acrylic surface actively bounces that brightness around, making a modest apartment feel significantly larger and much cleaner. If the room features matte black handles and a dark sink faucet, introducing a completely different, highly polished chrome light up top usually causes a massive visual clash. Aligning these material choices from the very beginning saves you from ripping out expensive hardware a few months down the road.
Color Temperature and Lumens Selection
The actual quality of the glowing bulb matters just as much as the beautiful metal shade wrapped around it.
Kelvin Scale Recommendations
Color temperature drastically shifts how people physically feel inside a room. Measured in Kelvins (K), this scientific scale dictates whether the glow feels like a cozy winter fireplace or a sterile hospital hallway. For heavy food prep zones, builders typically screw in 3000K to 4000K bulbs. This middle range delivers a crisp, neutral white glow that makes reading small recipe print and chopping carrots completely safe and clear. If the space functions more like a late-night wine bar, dropping down to a warmer 2700K gives off a much softer, highly relaxing yellow tint.
Table 2: Color Temperature and Room Function
| Kelvin Rating (K) | Visual Color Tone | Best Residential Application |
|---|---|---|
| 2700K | Warm Yellow | Dining zones, late-night entertaining |
| 3000K | Soft White | General ambient illumination, relaxed prep |
| 4000K | Cool White | Detailed chopping, reading tiny recipe print |
| 5000K+ | Daylight Blue | Commercial spaces, heavily detailed tasks |
(Data reflects general lighting industry guidelines for interior spaces.)
High CRI and Illumination Quality
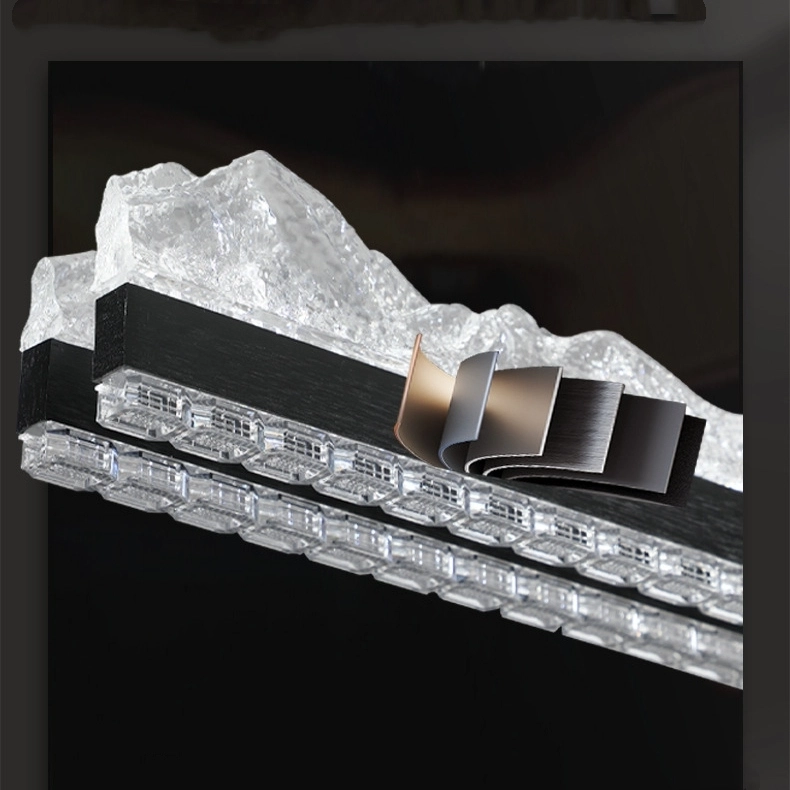
You also need to look closely at the Color Rendering Index (CRI) printed on the box. A high CRI reveals the true, natural color of your food. A cheap, low-quality bulb makes fresh red tomatoes look somewhat grayish and dull. Installing a premium fixture like the LED Pendant Light changes the entire cooking experience. With an impressive RA98 rating, it shows the exact natural color of every single ingredient sitting on the cutting board. Its brushed black 120cm linear body acts as a stunning minimalist centerpiece, providing wide, completely even coverage for those extra-long modern slabs.
Winway One-Stop Services and Support
Bringing a complex renovation to life requires a unified architectural strategy and highly reliable material sourcing.
Professional Design and Sourcing
Crafting an amazing room goes way beyond simply picking out pretty hardware from a website. It is a massive physical system where the floor tiles, the woodwork, and the ceiling fixtures all have to lock together perfectly. The experts at Winway provide a total one-stop supply solution. The dedicated design group relies on practical knowledge pulled from over 1,000 successful projects located in over 50 different countries. By taking your raw architectural drawings, the team precisely matches all the building materials, making certain that the final physical result perfectly mirrors the original computer renderings.
Global Logistics and Contact Information
Delivering top-tier construction goods requires serious quality control long before anything ever leaves the factory loading dock. The standard production protocol includes sending out detailed inspection reports and actual digital photos of the cargo containers being packed. The packing crews verify every item quantity to prevent any missing pieces and pack the ocean containers tightly so no valuable shipping space goes to waste. For anyone handling a major property project who wants to skip the heavy stress of logistics and compatibility issues, reaching out through the contact channel connects you directly with a highly professional team ready to deliver tailored quotations and deep technical support.
Conclusion
Tying a cooking space together requires exact math and highly thoughtful material selection. You have to lock in the proper vertical clearance, map out the horizontal gaps perfectly, and match the physical scale of the entire room. When you follow these strict physical rules for your Kitchen Island Lighting, the entire space immediately feels balanced and deeply welcoming.
Partnering with a proven, reliable supply team simply removes the daily headaches of matching textures and hunting down lost shipments, letting you fully enjoy your brand-new functional space without the usual construction stress.
FAQ
Q: What is the ideal height for Kitchen Island Lighting?
A: The standard building practice is to hang the bottom edge of the fixture exactly 30 to 36 inches above the countertop surface. This specific height provides excellent visibility for chopping without blocking your natural line of sight across the room.
Q: How far apart should I space multiple ceiling fixtures?
A: You should space the center points of the fixtures roughly 24 to 36 inches apart from each other. Always remember to leave at least six to twelve inches of blank space from the hard edge of the stone to the very last bulb to prevent weird shadows.
Q: What is the best color temperature for food preparation?
A: A neutral white bulb sitting right between 3000K and 4000K provides the absolute best clarity for cooking tasks. This specific range keeps the working zone bright and safe while totally avoiding those harsh, sterile blue tones.
